
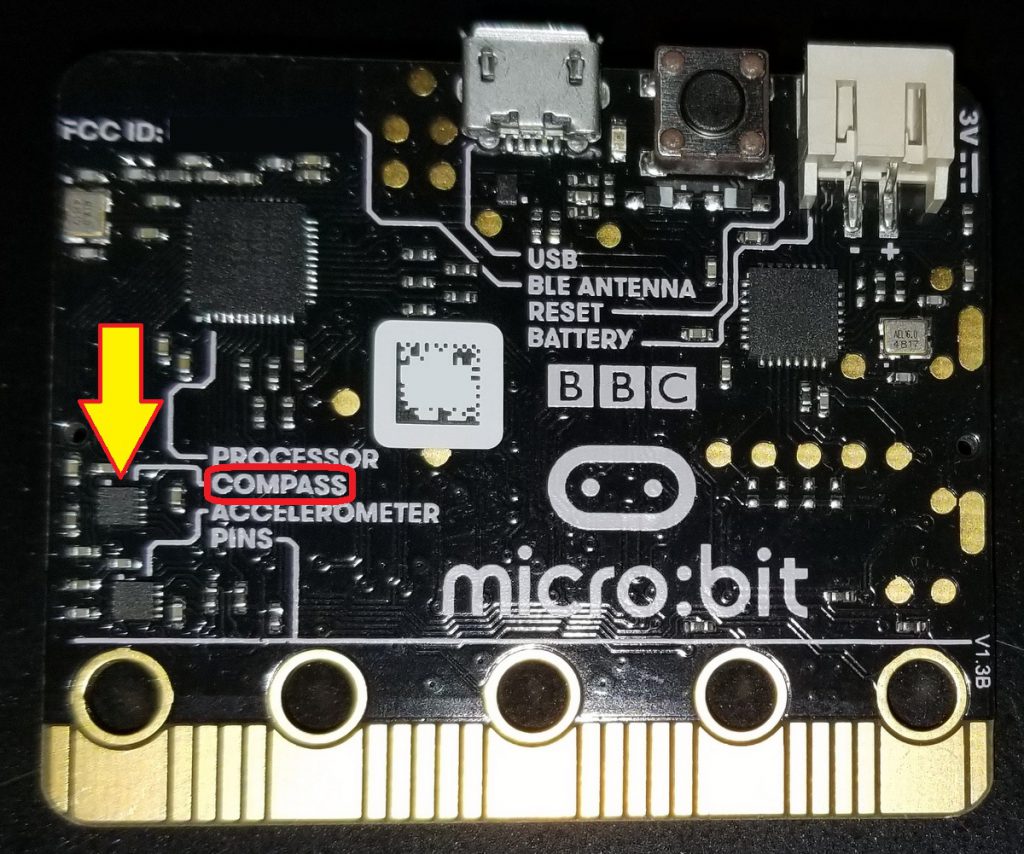
One of my favorite things about the micro:bit is that it comes with several sensors right on the board that can be used without any additional hardware. However, if you’re just starting out with a micro:bit, it can be a little challenging to know exactly how to use them all. In this post, I’ll be explaining the compass sensor – showing how to use it and walking through a simple program to turn your micro:bit into a working compass.
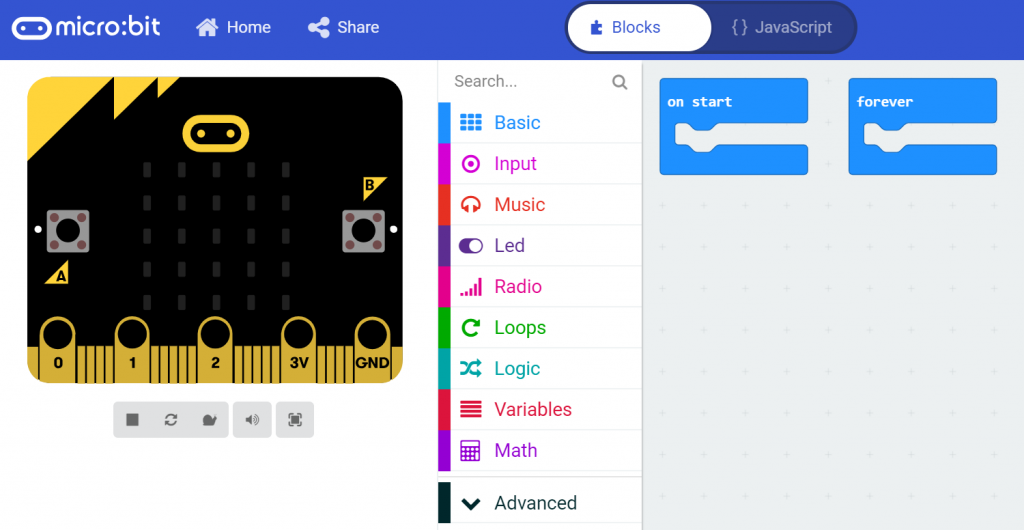
For this program, I’ll be using the micro:bit blocks in Microsoft MakeCode. (Scratch 3.0 has a Micro:bit extension, but as of this writing, it does not include a compass sensor block.) If you haven’t used MakeCode before – don’t worry. It is very similar to Scratch. The programming blocks are in the middle section of the screen, the programming area is on the right, and an image of a micro:bit appears on the left that will simulate how your program will appear on an actual micro:bit.

The compass heading block is found in the Input section of blocks. The corners are rounded – making this a data block. That means that it can be used anywhere in the code that you would normally use any other data block (such as a variable).
The compass heading block is constantly populated by the compass sensor on the micro:bit. As you physically turn the micro:bit, the value of the block will adjust to the current compass heading value in degrees. This will be an integer between 0° and 359°. (More info about the points of a compass can be found in this Wikipedia article.) Note that in this post, I’ll be discussing degrees and using the degree symbol (i.e. 50°) but it is important to understand that the actual value returned by the sensor will be a number. There is no need to worry about the degree symbol – it is assumed by the program.
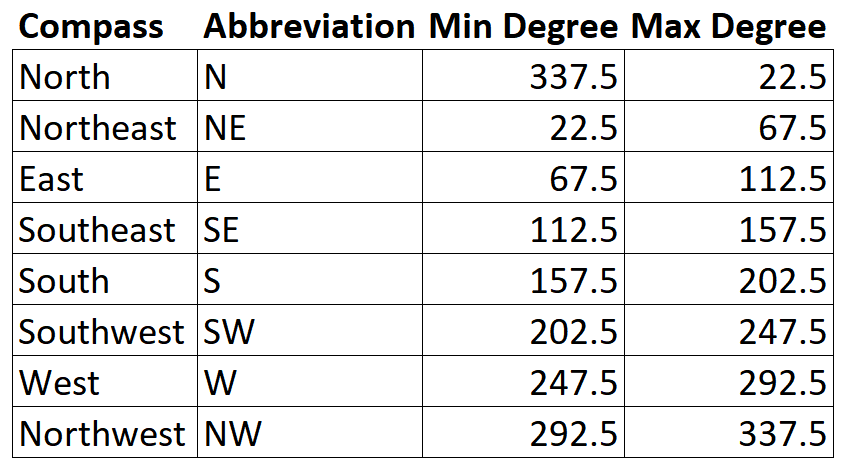
Compasses typically divide direction into various ranges of degrees. These can be quite specific (such as Southwest by South) which is useful when navigating but probably more detailed than we need for this project. We’re going to make a simple 8 point compass with the following directions: North, Northeast, East, Southeast, South, Southwest, West, Northwest.

To create our compass, we need to determine the ranges of degrees that will apply to each direction. Each direction must have a minimum and maximum degree value and anything that falls between those should be counted for that direction. For example, a heading of 178° should fall within the range of degrees that is close enough to south on our compass.
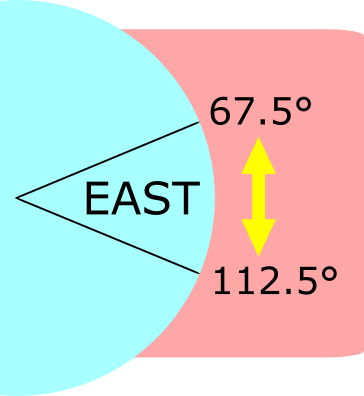
By finding the midpoint between two directions, we can define the edges of the degree ranges on our compass. In this example, East is defined as any degree between 67.5° and 112.5°
We can expand that out to the entire compass to determine our ranges for each direction.
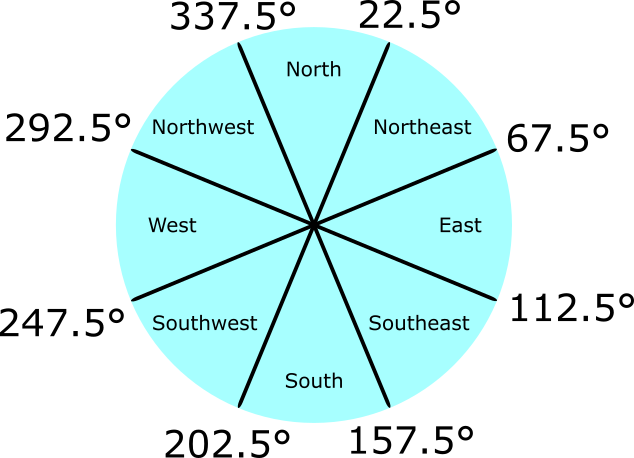
I’ve included the values in a spreadsheet for easy access as well.
Spreadsheet Download. (Open Document Spreadsheet format.)
The compass program is fairly simple and uses If, Else If, and Else blocks. (This could be a good project to learn basic programming control flow logic.) We’ll need the following blocks:
From the Logic Section:
1. If Else
2. And
3. Or
4. Comparative (greater/less than)
From the Basic Section:
1. Show LEDs
2. Pause
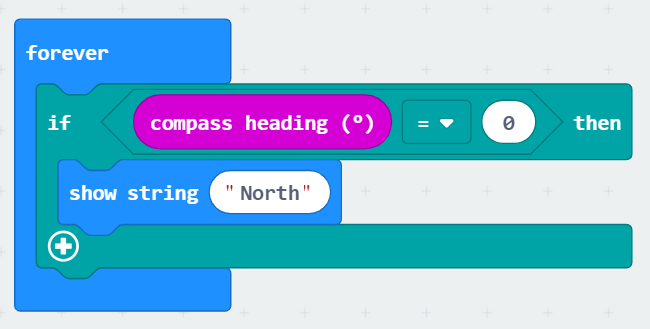
The program will use a series of If Statements that determines the output on the display based on the current compass heading value. The program below will display the word “North” when the heading value is exactly zero.
Of course, we don’t want to use exact values – we want to use the range of values that we determined above. We can combine multiple Comparative blocks by using the And block. In the example below, the ranges for Northeast and East are determined by determining if the compass heading value is greater than the minimum and less than the maximum value for each range. (I’ve used a greater than or equal block but you could also use a simple greater than block. The value of compass heading is an integer so it will never match exactly to a decimal point value.)
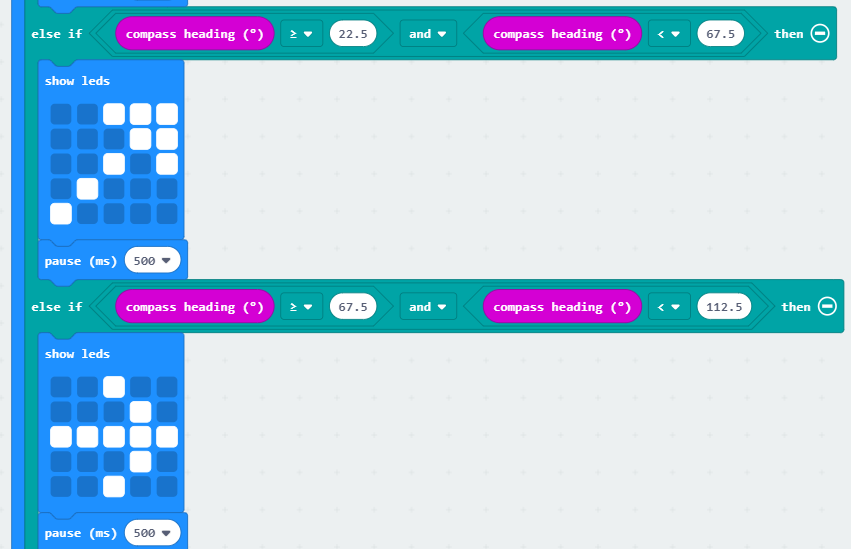
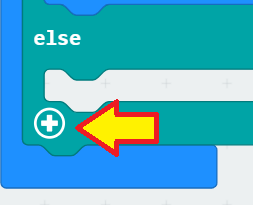
Notice the use of Else If partitions in the code above. This functionality is hidden by default, but you can add them to an If Else block by pressing the plus sign at the bottom.
I’ve used the Show LEDs block to draw an arrow indicating the compass direction. Alternatively, you could use a Show String block to display abbreviations such as “N” and “SW” or even the full direction name. (Keep in mind that strings greater than one character will need to scroll which will slow down how quickly you can get a new direction.) I’ve also used a pause block to wait 500 milliseconds (half a second) so that the display isn’t changing too quickly. The code is all placed in a forever block so that it will run as long as the micro:bit is on.
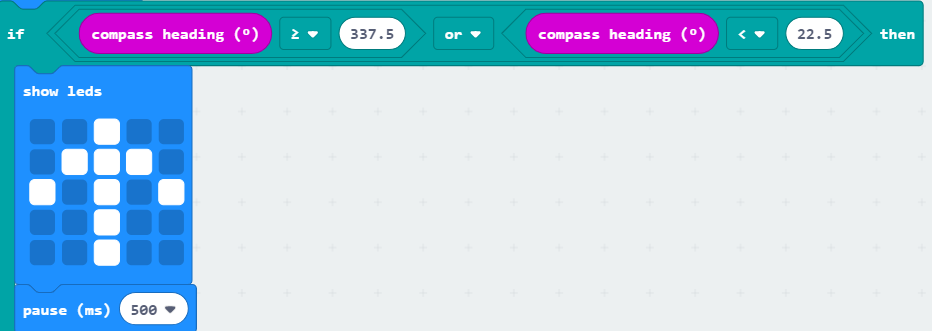
For most direction range, you will use an And block. However, the North block is unique because the minimum value is a larger number than the maximum value. (Remember, it is a circle so it resets to 0° after 359°.) Because of this, you’ll want to use an Or block for the North range. Because the value of compass heading will never be greater than 359 or less than 0, you don’t need to worry about defining the maximum or minimum values.
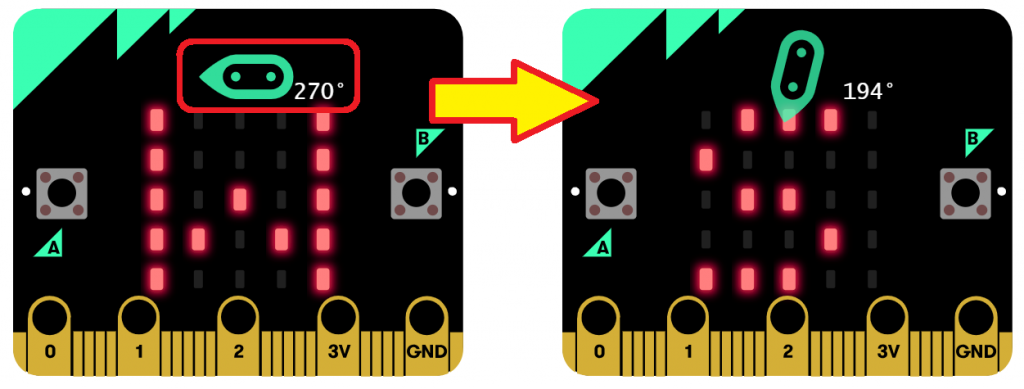
Microsoft MakeCode has a cool feature when using the compass blocks that allows you to test the code before loading it onto your micro:bit. A small arrow will appear on top of the micro:bit on the left side of your screen. You can drag this with the mouse to different directions to make sure that your code is working as expected.
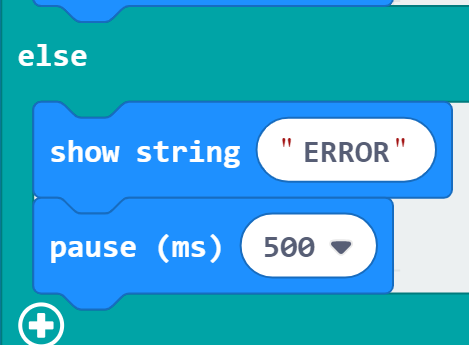
Finally, I like to add a message that will display in case there’s an error. If the sensor fails or is unable to determine the direction, the micro:bit should not display an arrow.
Any time you load a program involving the compass onto the micro:bit, you must first do an exercise where you tilt the micro:bit to move a blinking dot until it fills the screen. This orientates the device and makes sure that the compass readings are correct. You only need to perform the first time you load the program. Afterwards, it will load directly to the compass.
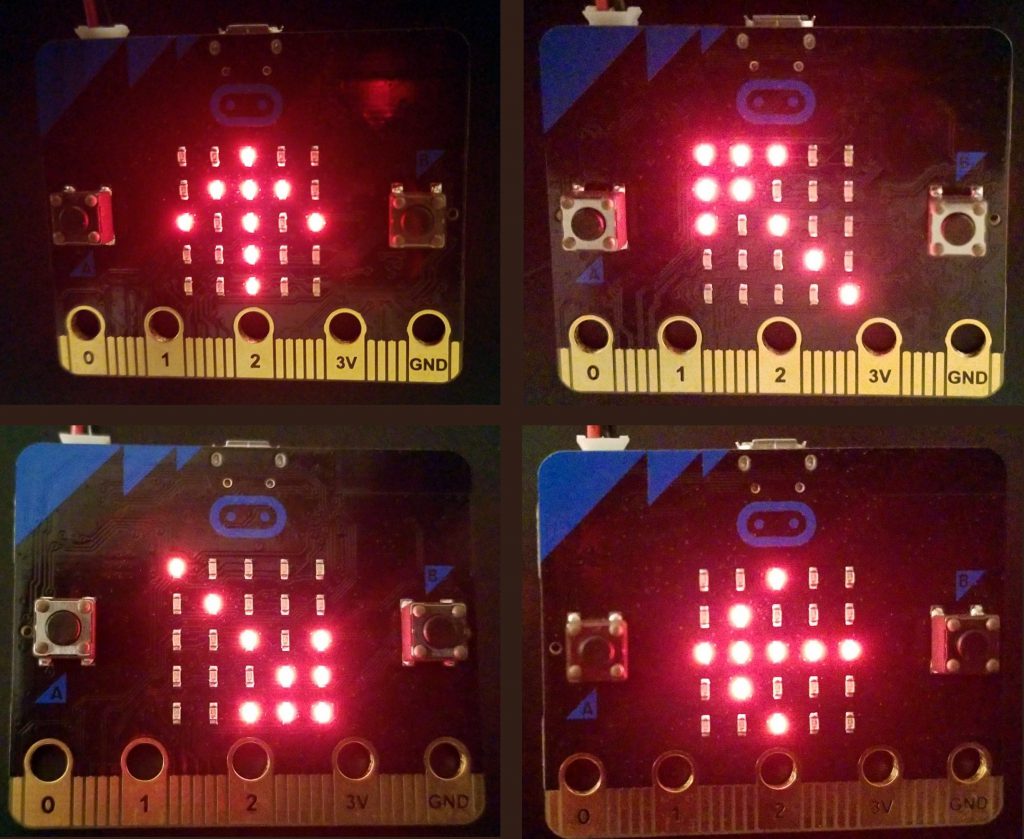
Once you’ve loaded the program onto your micro:bit, you can turn and the arrow will change to indicate the direction you are facing. The compass program works best when the micro:bit is laying flat. (If you hold the micro:bit upright, it will probably not work as expected.)
You can find the whole program here: Simple Compass for micro:bit.